对象的生命周期,Spring管理数据库连接池(重点),Spring EL表达式(了解内容)
对象的生命周期
IOC之Bean的生命周期
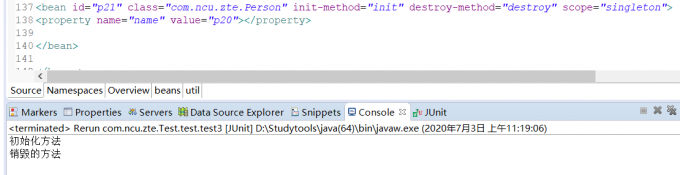
init-method配置初始化方法(bean对象创建之后)
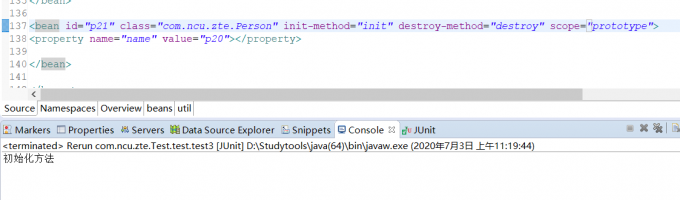
destroy-method配置销毁方法(在spring容器关闭的时候,只对单例有效)
<bean id="p21" class="com.ncu.zte.Person" init-method="init" destroy-method="destroy" scope="singleton">
<property name="name" value="p20"></property>

</bean>
测试的代码
@Test
public void test4() throws Exception {
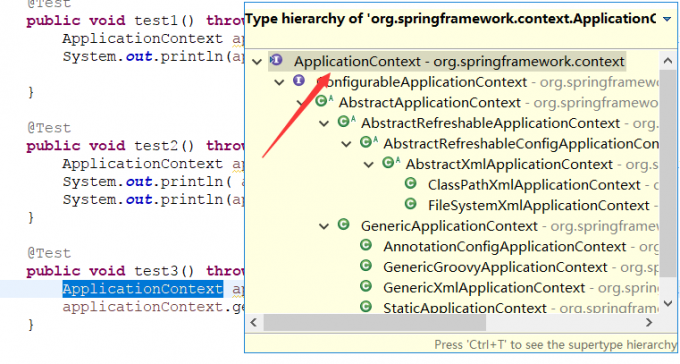
ConfigurableApplicationContext applicationContext = new ClassPathXmlApplicationContext("applicationContext.xml");
applicationContext.getBean("p21");
applicationContext.close();
}
Bean的后置处理器BeanPostProcessor
后置处理器,可以在bean对象的初始化方法前/后,做一些工作。
后置处理器使用步骤:
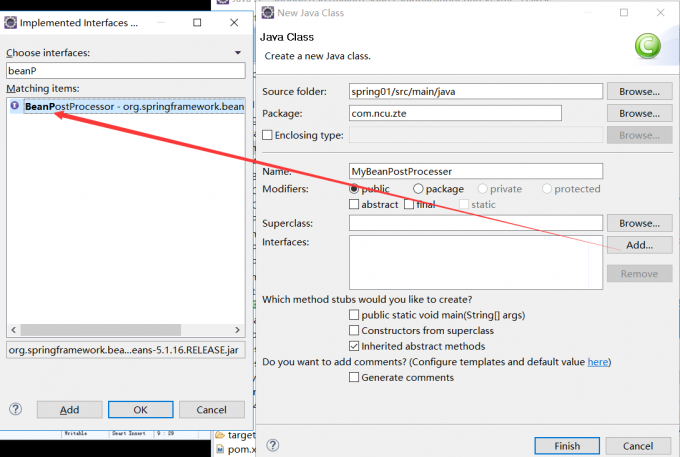
1、编写一个类去实现BeanPostProcessor接口
2、到Spring容器配置文件中配置
实验23:测试bean的后置处理器
创建BeanPostProcessor实现类:
package com.ncu.zte;
import org.springframework.beans.BeansException;
import org.springframework.beans.factory.config.BeanPostProcessor;
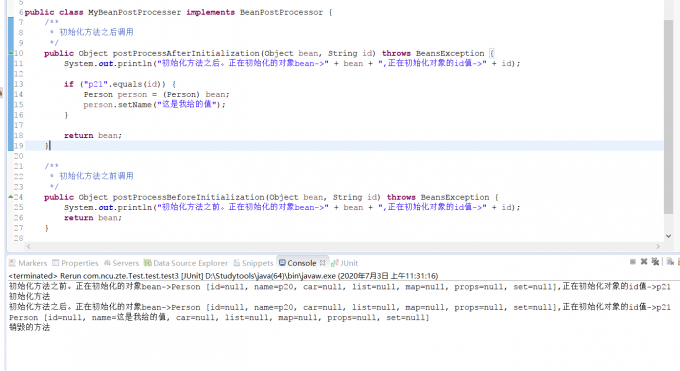
public class MyBeanPostProcesser implements BeanPostProcessor {
/**
* 初始化方法之后调用
*/
public Object postProcessAfterInitialization(Object bean, String id) throws BeansException {
System.out.println("初始化方法之后。正在初始化的对象bean->" + bean + ",正在初始化对象的id值->" + id);
if ("p21".equals(id)) {
Person person = (Person) bean;
person.setName("这是我给的值");
}
return bean;
}
/**
* 初始化方法之前调用
*/
public Object postProcessBeforeInitialization(Object bean, String id) throws BeansException {
System.out.println("初始化方法之前。正在初始化的对象bean->" + bean + ",正在初始化对象的id值->" + id);
return bean;
}
}
applicationContext.xml配置
<bean id="p21" class="com.ncu.zte.Person" init-method="init" destroy-method="destroy" scope="singleton">
<property name="name" value="p20"></property>

</bean>

<!-- 配置自定义的后置处理器 -->
<bean class="com.ncu.zte.MyBeanPostProcesser"></bean>	 测试代码:

@Test
public void test3() throws Exception{
	ConfigurableApplicationContext applicationContext =new ClassPathXmlApplicationContext("applicationContext.xml");
	System.out.println(applicationContext.getBean("p21"));
	applicationContext.close();
}
Spring管理数据库连接池(重点)
Spring配置管理数据库连接池对象(重点)
导包
commons-logging-1.1.3.jar
druid-1.1.9.jar
mysql-connector-java-5.1.37-bin.jar
spring-beans-4.3.18.RELEASE.jar
spring-context-4.3.18.RELEASE.jar
spring-core-4.3.18.RELEASE.jar
spring-expression-4.3.18.RELEASE.jar
可以在pom.xml中进行配置:
<project xmlns="http://maven.apache.org/POM/4.0.0" xmlns:xsi="http://www.w3.org/2001/XMLSchema-instance" xsi:schemaLocation="http://maven.apache.org/POM/4.0.0 http://maven.apache.org/xsd/maven-4.0.0.xsd">
  <modelVersion>4.0.0</modelVersion>
  <groupId>com.ncu.zte.spring</groupId>
  <artifactId>test</artifactId>
  <version>0.0.1-SNAPSHOT</version>
<dependencies>
<dependency>
  <groupId>com.alibaba</groupId>
  <artifactId>druid</artifactId>
  <version>1.1.23</version>
</dependency>
  <dependency>
  <groupId>commons-logging</groupId>
  <artifactId>commons-logging</artifactId>
  <version>1.2</version>
</dependency>
<dependency>
  <groupId>org.springframework</groupId>
  <artifactId>spring-beans</artifactId>
  <version>5.1.16.RELEASE</version>
</dependency>
<dependency>
  <groupId>org.springframework</groupId>
  <artifactId>spring-context</artifactId>
  <version>5.2.7.RELEASE</version>
</dependency>
<dependency>
  <groupId>org.springframework</groupId>
  <artifactId>spring-core</artifactId>
  <version>5.1.16.RELEASE</version>
</dependency>
<dependency>
  <groupId>org.springframework</groupId>
  <artifactId>spring-expression</artifactId>
  <version>5.1.16.RELEASE</version>
</dependency>

	<dependency>
		<groupId>mysql</groupId>
		<artifactId>mysql-connector-java</artifactId>
		<version>5.1.26</version>
	</dependency>
</dependencies>
</project>
applicationContext.xml配置:
<bean id="dataSource" class="com.alibaba.druid.pool.DruidDataSource">
	<property name="username" value="root" />
	<property name="password" value="root" />
	<property name="driverClassName" value="com.mysql.jdbc.Driver" />
	<property name="url" value="jdbc:mysql://localhost:3306/test" />
	<property name="initialSize" value="5" />
	<property name="maxActive" value="10" />
</bean>
测试代码:
@Test
public void test1() throws Exception {

	ApplicationContext applicationContext = new ClassPathXmlApplicationContext("applicationContext.xml");

	DataSource dataSource = (DataSource) applicationContext.getBean("dataSource");

	System.out.println( dataSource.getConnection() );

}

Spring引入单独的jdbc.properties配置文件(重点)
jdbc.properties属性配置文件
username=root
password=root
driverClassName=com.mysql.jdbc.Driver
url=jdbc:mysql://localhost:3306/test
initialSize=5
maxActive=10
applicationContext.xml配置文件:
<!-- PropertyPlaceholderConfigurer类专门用来加载properties属性配置文件 -->

<bean class="org.springframework.beans.factory.config.PropertyPlaceholderConfigurer">
	<!-- location属性设置你要加载的文件路径
				classpath: 表示从类路径下搜索
	-->
<property name="location" value="classpath:jdbc.properties" />
</bean>

<bean id="dataSource" class="com.alibaba.druid.pool.DruidDataSource">
	<property name="username" value="${username}" />
	<property name="password" value="${password}" />
	<property name="driverClassName" value="${driverClassName}" />
	<property name="url" value="${url}" />
	<property name="initialSize" value="${initialSize}" />
	<property name="maxActive" value="${maxActive}" />
</bean>
使用context名称空间加载jdbc.properties配置文件(重点)
修改jdbc.properties属性配置文件,尤其注意应该修改username为user,因为username是系统当中登陆的用户名,即administrator:
user=root
password=root
driverClassName=com.mysql.jdbc.Driver
url=jdbc:mysql://localhost:3306/test
initialSize=5
maxActive=10
applicationContext.xml配置文件:
<!-- 标签用来代替PropertyPlaceholderConfigurer加载属性配置文件 -->
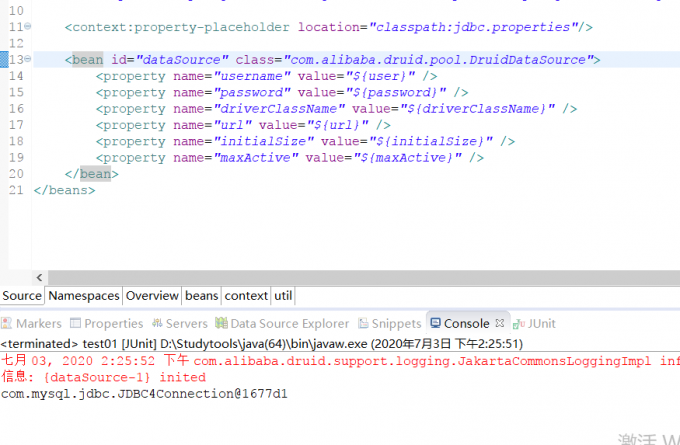
<context:property-placeholder location="classpath:jdbc.properties"/>
<bean id="dataSource" class="com.alibaba.druid.pool.DruidDataSource">
<property name="username" value="${user}" />
<property name="password" value="${password}" />
<property name="driverClassName" value="${driverClassName}" />
<property name="url" value="${url}" />
<property name="initialSize" value="${initialSize}" />
<property name="maxActive" value="${maxActive}" />
</bean>
Spring EL表达式(了解内容)
简介
Spring Expression Language,Spring表达式语言,简称SpEL。支持运行时查询并可以操作对象图。
和JSP页面上的EL表达式、Struts2中用到的OGNL表达式一样,SpEL根据JavaBean风格的getXxx()、setXxx()方法定义的属性访问对象图,完全符合我们熟悉的操作习惯。
基本语法
SpEL使用#{…}作为定界符,所有在大框号中的字符都将被认为是SpEL表达式
使用字面量
- 整数:
<property name="count" value="#{5}"/> - 小数:
<property name="frequency" value="#{89.7}"/> - 科学计数法:
<property name="capacity" value="#{1e4}"/> - String类型的字面量可以使用单引号或者双引号作为字符串的定界符号
<property name=“name” value="#{'Chuck'}"/><property name='name' value='#{"Chuck"}'/>
- Boolean:
<property name="enabled" value="#{false}"/>
引用其他bean
<bean id="emp04" class="com.atguigu.parent.bean.Employee">
	<property name="empId" value="1003"/>
	<property name="empName" value="Kate"/>
	<property name="age" value="21"/>
	<property name="detp" value="#{dept}"/>
</bean>
引用其他bean的属性值作为自己某个属性的值
<bean id="emp05" class="com.atguigu.parent.bean.Employee">
	<property name="empId" value="1003"/>
	<property name="empName" value="Kate"/>
	<property name="age" value="21"/>
	<property name="deptName" value="#{dept.deptName}"/>
</bean>
调用非静态方法
<!-- 创建一个对象,在SpEL表达式中调用这个对象的方法 -->
<bean id="salaryGenerator" class="com.atguigu.spel.bean.SalaryGenerator"/>

<bean id="employee" class="com.atguigu.spel.bean.Employee">
	<!-- 通过对象方法的返回值为属性赋值 -->
	<property name="salayOfYear" value="#{salaryGenerator.getSalaryOfYear(5000)}"/>
</bean>
调用静态方法
<bean id="employee" class="com.atguigu.spel.bean.Employee">
	<!-- 在SpEL表达式中调用类的静态方法 -->
	<property name="circle" value="#{T(java.lang.Math).PI*20}"/>
</bean>
运算符
- 算术运算符:+、-、*、/、%、^
- 字符串连接:+
- 比较运算符:<、>、==、<=、>=、lt、gt、eq、le、ge
-
逻辑运算符:and, or, not, - 三目运算符:判断条件?判断结果为true时的取值:判断结果为false时的取值
- 正则表达式:matches
###
创建java实体Bean对象
public class Person {
	private int id;
	private String name;
	private String phone;
	private double salary;
	private Car car;


public class Car {

	private String name;
	private String carNo;
实验26:[SpEL测试I]在SpEL中使用字面量
| 使用格式:#{数值} #{“字符串” | ‘字符串’} |
实验27:[SpEL测试II]在SpEL中引用其他bean
使用格式:#{bean的id}
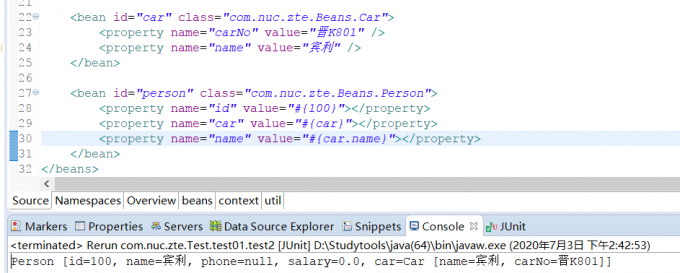
实验28:[SpEL测试III]在SpEL中引用其他bean的某个属性值
使用格式: #{bean.属性名}
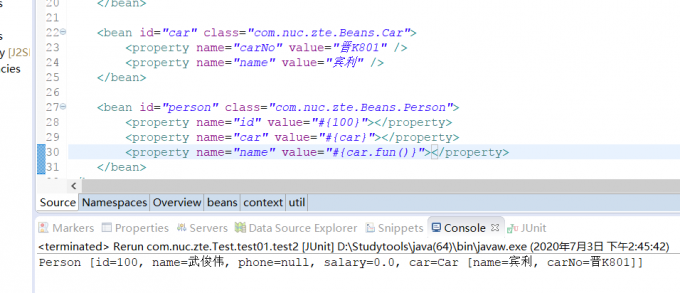
实验29:[SpEL测试IV]在SpEL中调用非静态方法
使用格式: #{bean.方法名(参数)}
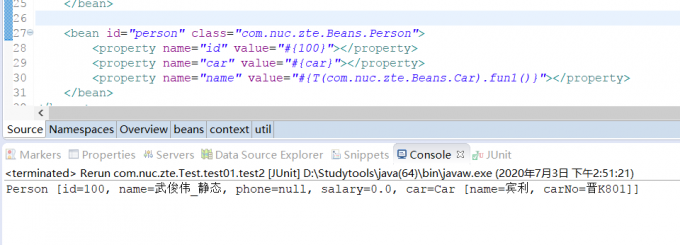
实验30:[SpEL测试V]在SpEL中调用静态方法
使用格式:#{T(全名类).方法名(参数)}
实验31:[SpEL测试VI]在SpEL中使用运算符
使用格式:#{表达式}
applicationContext.xml配置:
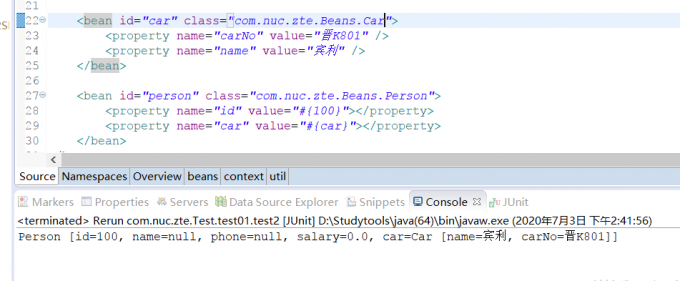
<bean id="car" class="com.atguigu.pojo.Car">
<property name="carNo" value="京B123412" />
<property name="name" value="蓝脖鸡泥" />
</bean>
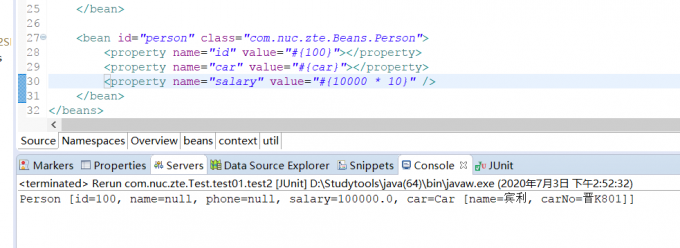
<bean id="person" class="com.atguigu.pojo.Person">
<!-- 实验26:[SpEL测试I]在SpEL中使用字面量 -->
<!-- 使用格式:#{数值} #{“字符串” || ‘字符串’} -->
<property name="id" value="#{100}" />
<!-- <property name="name" value="#{'我是SpringEL输出的字符串'}" /> -->
<!-- 实验27:[SpEL测试II]在SpEL中引用其他bean -->
<!-- 使用格式:#{bean的id} -->
<property name="car" value="#{car}"></property>
<!-- 实验28:[SpEL测试III]在SpEL中引用其他bean的某个属性值 -->
<!-- 使用格式: #{bean.属性名} -->
<!-- 		<property name="name" value="#{car.name}"></property> -->
<!-- 实验29:[SpEL测试IV]在SpEL中调用非静态方法 -->
<!-- 使用格式: #{bean.方法名(参数)} -->
<!-- 		<property name="name" value="#{car.fun()}"></property> -->
在Car中添加fun()方法
<!-- 实验30:[SpEL测试V]在SpEL中调用静态方法 -->
<!-- 使用格式:#{T(全名类).方法名(参数)} -->
		<property name="name" value="#{T(com.atguigu.pojo.Car).staticFun()}"></property>
在Car中添加fun1()方法:
public static String fun1(){
	return "武俊伟_静态";
}
<!-- 实验31:[SpEL测试VI]在SpEL中使用运算符 -->
<!-- 使用格式:#{表达式} -->
		<property name="salary" value="#{10000 * 10}" />
	</bean>